Are you looking to bake homemade bread that rises perfectly and has a wonderful homemade flavor? Baking high quality loaf bread at home may seem daunting for beginners. But with these helpful tips, you can achieve bakery style results right in your own kitchen.
So, keep reading this blog post, we’ll share 4 baking tips for perfect homemade bread. You’ll learn secrets that will help you bake loaves with a crisp crust and light, airy crumb.
Are you ready to discover baking tips for perfect homemade breads? So let’s get started!
Achieving flawless homemade bread that rivals your favorite bakery takes attention to detail. From well developed dough to beautiful oven spring to the perfect crusty top, follow 4 tips below for results.
Prepare yourself for homemade bread success by gathering high quality ingredients, the proper tools, and following our guidelines closely. Let the compliments roll in!
The foundation of stellar homemade bread is an excellent, time-tested recipe. We recommend starting with a basic white or whole wheat bread recipe until you master the basics.
Reliable recipes have been perfected over time and outline ingredients, quantities, mixing directions, proofing and baking instructions for ideal outcomes.
Have you struggled with subpar bread recipes in the past? Take control and try our tested tips for guaranteed homemade bread success!

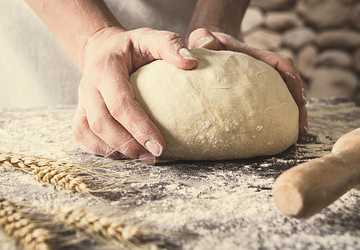
Once your bread ingredients are combined, kneading is crucial. Kneading stretches the gluten strings to help bread rise tall. Knead for 8-10 minutes until the dough feels smooth and springy. If it remains sticky, sprinkle in small amounts of flour until it no longer clings to the bowl.
Are you unsure how to tell when bread dough is adequately kneaded? Follow kneading guidelines closely, soon you’ll be able to identify perfectly kneaded dough.
Once kneaded, put the dough in a bowl lightly coated with oil. Cover it and let it rest to rise. Proper proofing time allows yeast to produce air bubbles that make bread rise.
Depending on your recipe, proofing can take 1 to 2 hours at warm room temperature, overnight in the fridge, or a few days for a slow fermentation. If indentations remain, full proofing is reached.
Do your bread doughs fail to rise sufficiently? Use our proofing instructions and troubleshoot improper proofing for lofty, airy loaves every time.

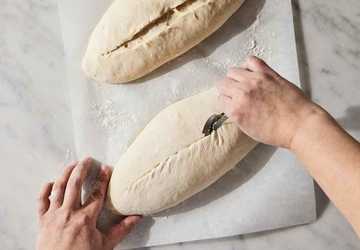
Right before bread goes into the oven, make 1⁄4 to 1⁄2 inch deep slashes across the top with a serrated knife or lame. Scoring creates weak spots for expansion and bakes into an artisanal look with enticingly crisp edges.
Would you like to learn how to score bread dough for an impressive artisanal appearance? Angle cuts diagonally or decoratively for visual flair.
With these practices using a reliable recipe, thoroughly kneading, adequately proofing, and skillfully scoring your dough, you can master the art of bakery level homemade bread.
By implementing these fundamental tips, you will reward yourself with load after load that features a tantalizingly crackly golden crust encasing a light, fluffy and even crumb.
The satisfaction you will feel when slicing into a freshly baked loaf and savoring your own handiwork will inspire you to keep perfecting your craft. Soon, your kitchen will smell like an artisanal bakery every morning.
Q. What are the best flour types for homemade bread?
Ans. Bread flour and whole wheat flour have more protein than all-purpose and produce great structure and rise. For lighter texture, try AP flour or bread flour blends.
Q. How do you store homemade bread correctly?
Ans. After you let the bread cool completely, store it cut-side down on a cutting board or in a paper bag. For longer shelf life up to one week, you should wrap the loaf tightly in plastic wrap. Freeze any extra loaves you bake.
Q. What oven setting should you use for bread?
Ans. You should preheat your oven to 375-400°F. Place a baking sheet or stone on the center rack. The hot surface helps create an initial "oven spring" for better rise when you bake.